Cut Bottles and Create Art
This glass bottle cutter is the simplest one I’ve used. I’ve made glasses, candle holders, garden decorations, lamp shades – all sorts of creative delights!
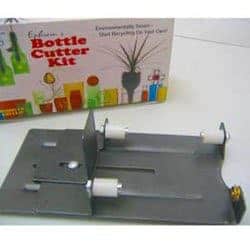
Click to buy the Ephrems Bottle Cutter at Amazon (paid link).
This cutter holds the bottle firmly, which helps you to make the scoreline accurately.
The Ephrem’s kit includes:
- Bottle cutter
- 3-wheel cutting head
- Candle
- Polishing paper
- Carbide polishing powder
- Instruction booklet
- Ideas for things to make
Step One: Position The Bottle

Remove all the labels and clean your bottle thoroughly before you start. Place the bottle longwise on the cutter, with the end flush against the backstop and resting on the rollers.
Decide where you want to cut the bottle by loosening the screw and moving the backstop forward for a shorter cut and backwards for a longer cut.
Step Two: Scoring The Bottle
This is exactly the same as making a score line when glass cutting. It’s best to dab some oil on to the wheel each time before you start – any oil and a paper towel will do. The scoreline is the most important part, so take it slowly, using constant pressure, but not too hard. The glass separates better with a light, even scoreline.
Click to buy the Ephrems Bottle Cutter at Amazon (paid link).
– Rotate the bottle towards you with two hands (see photo).
– Keep it firmly against the backstop and keep it moving while you’re making the scoreline.
– This will take practice if you’ve never used a cutter to cut glass before. Only go round once, it’s not good for the wheel to go over a cut.
– You’ll hear a little crunching noise when you reach the beginning of your scoreline.
– Check that you haven’t missed any bits, and that you have an unbroken scoreline.
You do have to be a bit patient, though, especially if you have never cut glass before. Get a few bottles to practice on first, and remember that cheap wine bottles are not very well made and can sometimes be tricky to cut.

Step Three: Heating The Scoreline
If you think about the scoreline being a scratch on one side of the glass, rather than a ‘cut’, it makes it easier to see why you have to heat the glass now. The scratch needs to be cracked through to the other side before the bottle will separate.
– To do this, light the candle provided in the cutter kit, and slowly turn the bottle about an eighth of an inch from the flame. If you go closer, the bottle will heat too quickly. Try to do it evenly. This part takes a while, and it will take practice to know when the glass is hot enough.
– Be prepared to spend about 2-3 minutes heating the glass. The bottle should feel hot to the touch – but not enough to burn you!
Step Four: Separating The Bottle
Ephrem’s instructions suggest using an ice cube to ‘shock’ the glass so it cracks apart. You can do this by rubbing the cube around the etched line one or two times.
I use a bucket of very cold water – it’s easier to dip the bottle in to, and allows the whole scoreline to be shocked at the same time.
– The glass should ‘crack’ all around the scoreline, you’ll see it changing from looking like a scratch to a cut.
– Tug gently on the two pieces and the bottle should separate.
– If not, reheat and you should hear the glass cracking.
– You may have to repeat Steps Three and Four depending on the thickness of the glass bottle.

Step Five: Smoothing The Edges
Finally, you need to make the cut pieces safe to touch.
– Use the coarse polishing paper provided to rub the inside and outside edges of the cut to prevent chipping.
– Sprinkle a small amount of the polishing powder on piece of thick scrap window glass, dip the edge of the glass in water and start grinding in a circular motion. The edge will become perfectly flat.
– Lastly, use the finer polishing paper wet to give a final smooth finish.
I’ve found a very bad video that might help you! The camera work is very uneven, and the guy mumbles, but despite that, it will show you how to cut glass bottles with this particular cutter. It always helps to see things in action:
Click to buy the Ephrems Bottle Cutter at Amazon (paid link).
I’ve always found them to be extremely helpful both to speak to and via email. They ship worldwide and operate a 100% Satisfaction Guarantee.