Complete Kiln Firing Program

This general kiln firing schedule for kiln carving will enable you to slump unique textures on your artwork.
With any firing program, there are so many different variables to think about.
Some about the kiln (eg. size, where the elements are situated, insulation properties).
Others about the glass (eg. type, thickness, inclusions, pre-fusing).
The schedule below is to be taken as a starting point for your own experiments only.
So what exactly is kiln carving?

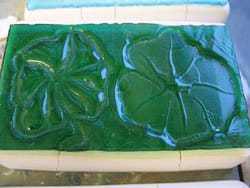
Kiln carving describes the process by which you slowly melt glass into a shallow mould so that it picks up the shape or texture of that mould.
Whether that mould is made of ceramic fibre paper, plaster of paris or clay is immaterial.
The crucial difference between slumping and kiln carving is the detail and depth. Slumping is when you shape glass into a smooth bowl mould which can be quite deep, whereas kiln carving allows for much more detail in shallow relief.
The temperature for kiln carving is higher than slumping because the glass needs to reach a more liquid state to pick up small details.
The firing schedule below is calculated for two 1/8″ (3mm) layers of Bullseye that have been pre-fused. Check the annealing temperatures for the art glass you’re using and adjust accordingly.
The cycle lasts for approximately 18 hours.
Kiln Carving Firing Schedule
Segment |
Rate Degrees F |
Temp F
|
Soak (Hold) |
Additional Notes |
|
1
|
230
|
896
|
15-20
|
Primal heat up. Taken slowly so that you don’t shock the glass. Slow down further if you have any inclusions, of if glass is next to elements. Vent a kiln at this stage, to burn off glue and other organic material. |
|
2
|
536
|
1103
|
–
|
Moving from Primal to Forming stage. Glass unlikely to thermally shock at this range, but do be cautious – if it is thicker, or contains any element that interferes with even heating, slow the rate of this segment down. |
|
3
|
131
|
1250
|
30
|
The slow rate up during this segment and the 30min soak is known as the ‘bubble squeeze’. It allows the glass to settle together, and reduces the chance of bubbles. If you want to encourage bubbles, you can remove this section. |
|
4
|
as fast as possible
|
1535
|
20
|
Moving into the liquid stage. To avoid devitrification (crystals forming on the surface) ramp up to top temp. as fast as possible. There are many alternatives to this approach – e.g. using heat work during the ramp up, which means going up slower and holding at a lower top temp. Use the kiln firing program that’s right for your project. The 20min soak allows the slumping glass to take the form of the fusing molds it’s resting on. Adjust accordingly. |
|
5
|
as fast as possible
|
959
|
60
|
It’s now time for the quick descent into the annealing range. It’s generally agreed that going down as fast as possible from the top temp. to the start of the annealing stage is crucial. The 60 min hold allows the molecules in the glass to realign and the temperature throughout to equalize. |
|
6
|
82
|
799
|
–
|
Now a slow cool through the annealing range. The glass contracts and hardens evenly so that it can return to a secure solid state. This is the time when any incompatibilities in the glass are exposed – the rate of contraction is different and the glass will crack. |
|
7
|
131
|
700
|
–
|
This segment finishes off the annealing safely. |
|
8
|
330
|
100
|
end
|
Take the glass down to room temperature. You can slow this section of the kiln firing schedule down if there are any elements that could contribute to thermal shock. Don’t open until it’s at room temp, however tempting!!! |